MLP - MAILING LIST PRINT
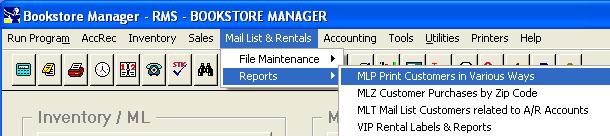
To open MLP, press <Alt M> ("Menu") and follow the Menu path illustrated below, then press <Enter>, or simply enter <MLP> in the "Enter Program Name" field and press <Enter>.
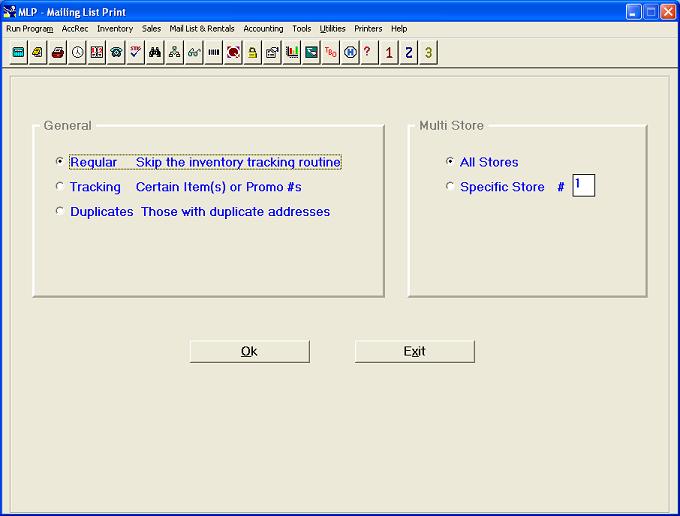
- Regular - Skip the Inventory Tracking Routine: Will not be limited by the tracking routine.
- Tracking - Certain Item(s) or Promo #s: Must have purchased certain item. Will be limited to items you are tracking by item, author, or promotion number.
- Duplicates - Those with duplicate addresses: Will print all mailing list duplicate entries and indicate how many there are. The names will be sorted by zip code and by number of characters chosen in the address.
Regular - Skip the Inventory Tracking Routine
Mailing List Print Screen
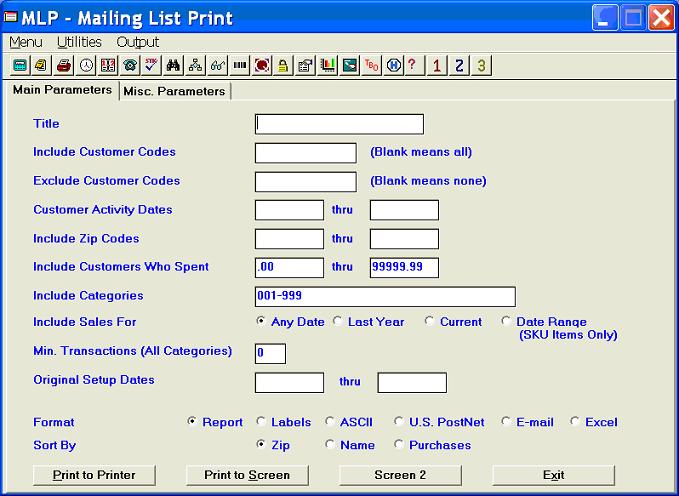
Note: If you are not consistently tying the sales to the mailing list telephone number, the ability to include or exclude certain customers on the mailing list labels, reports, or ASCII files will not be accurate.
Note: Mailing list labels conform to the standard setup by the U.S. Post Office.
When printing labels, you can enter a "Title" line (Example: "Rev." or "Mr."), or, if you press <Enter> and leave this field blank, no title line will be printed on labels.
Put customer codes in the mailing list that you want to include on labels, report or ASCII file. If you press <Enter> and leave this field blank, all codes will be included.
Put customer codes in the mailing list that you do not want to include on labels, report or ASCII file. If you press <Enter> and leave this field blank, no codes will be excluded.
You may limit the labels, report, or ASCII file by entering a range of customer activity dates. This looks at the last activity date of the customer and, if the date on the last activity is in the range of dates entered, the customer will be included.
You may limit the labels, report, or ASCII file by entering a range of zip codes. All customers with zip codes within the range entered will be included. If you leave these fields blank, all zip codes will be included.
Include Cust. who spent Between:
Enter a range of dollar amounts spent, and only customers who have spent within the range entered will be included. If you leave these fields blank, the labels, report, or ASCII report will not be limited by dollar amount. If you enter a minus dollar amount, customers who have not purchased anything will be printed.
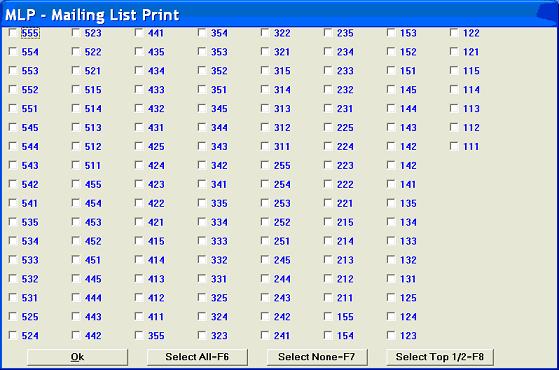
The default, 001-999, will include all categories. You may print a range of categories plus specific categories by using a comma to separate the specific categories and a hyphen for a range.
Example: 51-55,63,70
You may limit the labels based upon a minimum transaction count.
Example: Customers who have frequented the store more than six times this year.
When limiting the labels, report, or ASCII file to customers who have purchased certain dollar amounts, you may choose to compare the dollar amounts to the current purchases, last year’s purchases, or the total purchases. The default is "Total."
Enter a beginning date and ending date, and all mailing list customers who were setup between the dates entered will be pulled to the labels, report, or ASCII file. If you leave these fields blank, the customers will not be limited by the setup dates.
Screen 2
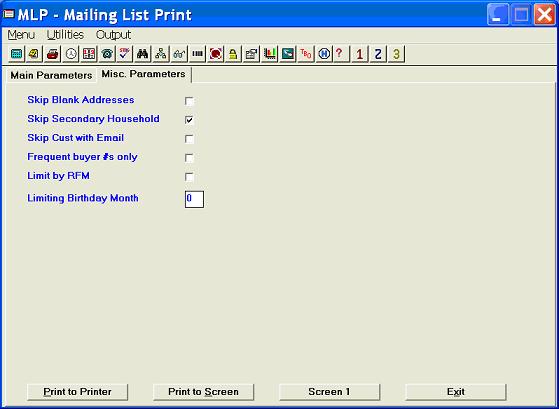
You can skip secondary people within a household.
Limit the MLP report to customers who have frequent buyer numbers assigned.
Skip Customers who have an Email address on file
Don't export customers who have Emails on file.
Limit by RFM
For an explanation of RFM values see "MLRFM".
Limit the report to people who have a birthday in a particular month.
You can choose to print reports or labels, to create an ASCII file, Excel or to send E-mails to targeted customers.
Note: BSMGR’s E-mail is an optional feature. Call the BSMGR sales department if you are interested in purchasing this feature.
The default print format is "Report." The number of records pulled will be displayed.
Notes:
- The ASCII file created is NAMES.ASC and will be in the BOOK directory.
- The "U.S.PostNet Labels" option prints labels with barcode.
- You have the option of printing a one-line or two-line report.
- One-line report - includes the following information: The name, addresses 1 and 2, city, state, zip code, and last activity date.
- Two-line report - includes the same information, plus the following: The date opened, current transactions, last year’s transactions, total transactions, codes (customer types, and will also include the first two department purchase codes), and telephone number.
These is an option do export and import MLP with Excel. Please see the "Import Changes from Excel" section for more detail.
Overview:
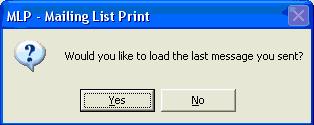
When you choose the “Email” option, you will have a new window presented where you can indicate the subject, select an attachment and enter the body of the message. If you have used this feature before, you will first be asked if you want to load the last message you sent.Choosing “Yes” only means that the details from your last MLP emailing will be entered for you automatically. You will be able to make changes before the message is sent.
There are two areas for you to use to enter the message data. The top area is for the text message. If a customer is using an email application that doesn’t support HTML email messages, they will see what you enter in this area. The lower area is for the HTML message. If a customer is using an email application that supports HTML email messages, they will see what you enter in this area. This area corresponds to the segment of HTML between the <body> and </body> tags. HTML is what is used on web sites to create hyperlinks, modify text and include other features such as images. Text modification can be as simple as making some words bold, underlined or italicized, you change the font or you can include a Cascading Style Sheet (CSS) to give you more control over the presentation of your message. If you want to learn more about HTML coding, simply click the “HTML Help=F8” button. This will open an HTML tutorial hosted by www.w3schools.com. Once you think you are ready to send the message, if you are including HTML, then you can click the “View/Test HTML Message=F7” button to see the HTML version of your email message in a pop-up window.
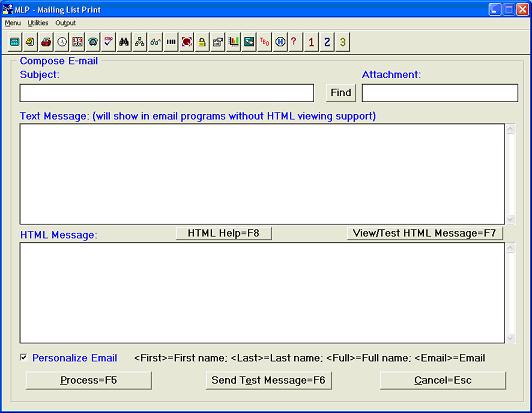
Personalize EmailWhen you send out an email message, you can personalize each message by clicking the “Personalize Email” check box near the bottom of the screen. When this box is checked, you will see additional labels reminding you what to use in your message for personalization. For example, any occurance of “<First>” will be replaced with the first name of the recipient of that message. This is done message by message, so each message can (and probably will) have a different name where <First> is used. The “<Email>” tag allows you to include the recipient’s email address in the message. One common use for this is inclusion in the footer to indicate the email address that the message was sent to in the removal instructions footer. Note: since the “Personalize Email” tags will be replaced with different information for each message, the “View/Test HTML Message=F7” feature plugs random names so you can see how it will look.
Send Test Message=F6
Click this to send a single copy of the message. If you have “Personalize Email” checked, then you will be able to indicate the values you want to put in place of <First>, <Last>, <Full> and <Email>. You will need to enter an email address (normally your own) and click <OK>.
Process=F5Once you are satisfied that the message is ready to send, click this button to send the message out to the list of email addresses that were pulled from MLP. The details from this message will be saved for you to start from (or use unchanged) with the next message you send from MLP.
You can sort by zip code, customer name or, if you choose to sort by purchases, the dollar amount of purchases will print on the report. The default is "Zip."
Note: For Windows users only (particularly if using a dot matrix printer):
When printing labels, if print alignment is "off," you can adjust the alignment at the "Column Offset" pop-up window by entering a number, which will shift the alignment by the number of spaces represented by this number.
Examples: By entering the number 1 in this field, the second and third columns will shift over by one space each. In turn, the third column will shift over one additional space (total of two spaces). If the number 2 is entered, these columns will shift two spaces each, with the third column shifting an additional two spaces (total of four spaces).
Example: Column Offset 1
Example: Column Offset 2
Note: If, after choosing to print, you wish to cancel and discontinue printing, press the <Esc> key. A message, "Stop this Print Rtn?", will be displayed Select "Yes" and the program will be canceled. Select "No" and it will continue printing. When canceling, some printing may still be in the printer spooler. You will need to turn off the power to the printer to discontinue this printing.
Tracking - Certain Item(s) or Promo #s
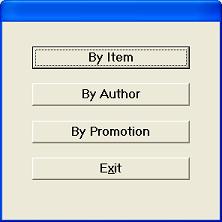
After you choose the desired tracking method, the following screen will be displayed:
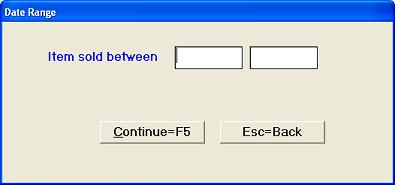
Enter the date that the items have been sold since and select "Continue F5."
By Item
After selecting "By Item" and entering the date that items must have sold since, enter all of the valid item numbers for individual items you are tracking. (The items must have a "Y" in the "Track" field in IVM.) You may enter up to twenty items, and the labels, report, or ASCII file will be limited to these items. Select "Continue F5" to sort. After the sort is completed, the "Mailing List Print" screen will be displayed for you to fill in according to the parameters of your choice. You may Print to Printer or Print to Screen.
After selecting "By Author" and entering the date that items must have sold since, enter all of the valid authors you are tracking. (The items by these authors must have a "Y" in the "Track" field in IVM.) You may enter up to ten authors. The authors’ names must be the same as entered in the "Auth/Artist" field of items by these authors in IVM. However, you may use a "wild card." (To use a wild card, put in the last name of the author with an asterisk, in order to find all the variations of the name.)
Example: "OKE*" would find authors OKE, OKE J, OKE J., and OKE JAN.
Select "Continue F5" and the labels, report, or ASCII file will be limited to these items. After the sort is completed, the mailing list print screen will be displayed for you to fill in according to the parameters of your choice. You may Print to Printer or Print to Screen.
After selecting "By Promotion" and entering the date that items must have sold since, enter all of the promotion numbers you are tracking. You may enter up to ten numbers. The items you are tracking may have a promotion number in the "Promotion #" field in IVM or, at POS, you can put all the items of a transaction on a promotion number.
Select "Continue F5" and the labels, report, or ASCII file will be limited to these items. After the sort is completed, the mailing list print screen will be displayed for you to fill in according to the parameters of your choice. You may Print to Printer or Print to Screen.
Duplicates -Those with duplicate addresses
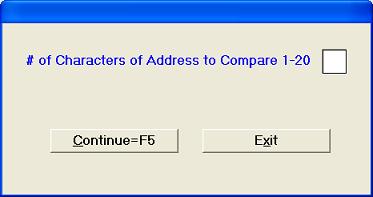
Enter the number of characters of the address you want to compare. (You may enter up to twenty.) Select "Continue F5." A message, indicating the number of records that have been pulled, will be displayed. The report will be sorted by zip code and will show the following information:
Name, Addresses 1 and 2, City, State, Zip Code, and Last Activity Date.
You may then edit the MLM masterfile to delete the duplicate addresses.